How to better close the seams between the plates. Seaming seams between overlap plates. Features of repair work
The situation when the plaster literally falls from the ceiling on the head, familiar to all residents of apartment buildings of the Soviet buildings. Such phenomena also affect private cottages during the shrinkage period of the building, especially as a result of poor-quality finishes and savings on building materials. The problem is unpleasant, but completely disposable, and without the help of hired masters - plasterers. Let's look at how the seams are performed correctly between the slats of the overlap to solve the question on their own.
The thick layer of mastic on the back of each box will be sealing the passages and unused knockouts. Install plasterboard on the walls with an airtight way and complete it with a solid layer of plaster or properly stick it to create an additional air barrier inside. One of the key places for air seal is a gap where plasterboard touches the top plate of wall cladding. If possible, close the gap between the ceiling plasterboard and the upper plates on top after the ceiling plasterboard is in its place.
What to close the jokes on the ceiling
According to the old technology used in the Soviet era, interpanel gaps (otherwise - Rusta) tightly stuck pacles, and then filled with plastering solution. Moreover, the latter was supplied by a mechanized manner on a hose from a special station.
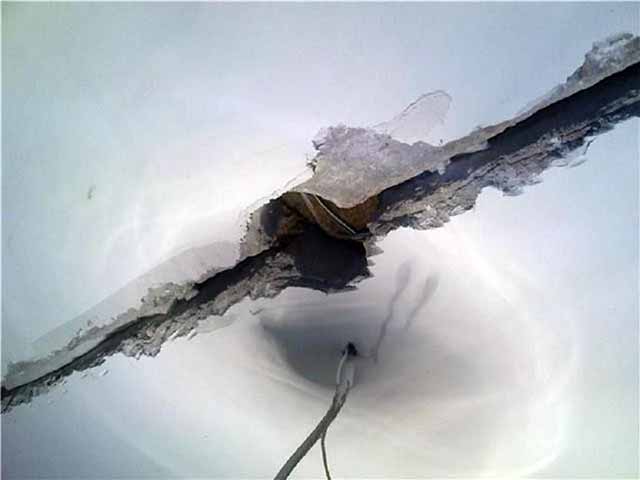
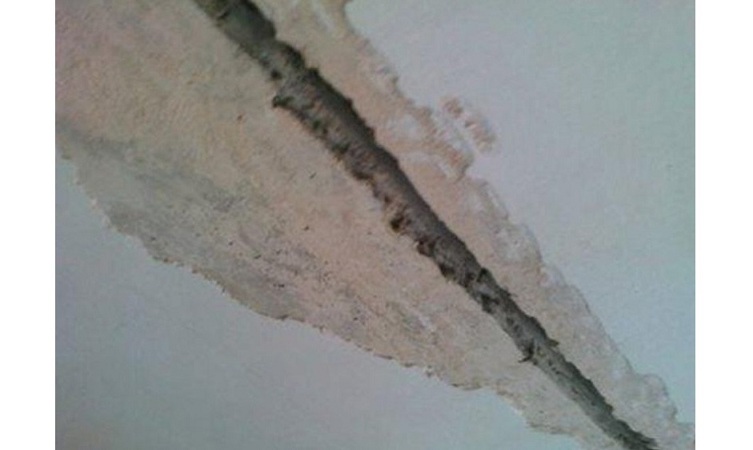
Since simple lime or cement plaster It does not have elasticity and is distinguished by the average degree of adhesion, the ceiling cracks appeared already in the process of shrinkage of the building. At the first repair, the neighbors from the top apartment she starts to fall out, and then fall off with whole pieces. The same picture was observed on the ceiling of the last floor due to disorders of the roof waterproofing.
Some builders fasten the gasket to the surface of the top plate in front of the plasterboard to fill this gap. After the plasterboard was installed and the inner shell was sealed, start the fan door again to identify and seal all the remaining leaks.
As for the ceiling, we have a good height, no changes in levels, but there are spaces. Thanks again for your advice! If you do not delete the plates, make sure that they are well glued to the ceiling. Since the weight of the fabric, with attached to the plates, can also weaken the safety measures to accept. Your cloth must be fireproof, these standards and especially if you are tenants. If something happens, nor your insurer nor your landlord will cover you for damage caused by this fabric. There are also houses that sell upholstery, and sometimes offer wall and ceiling fabrics.
![]()
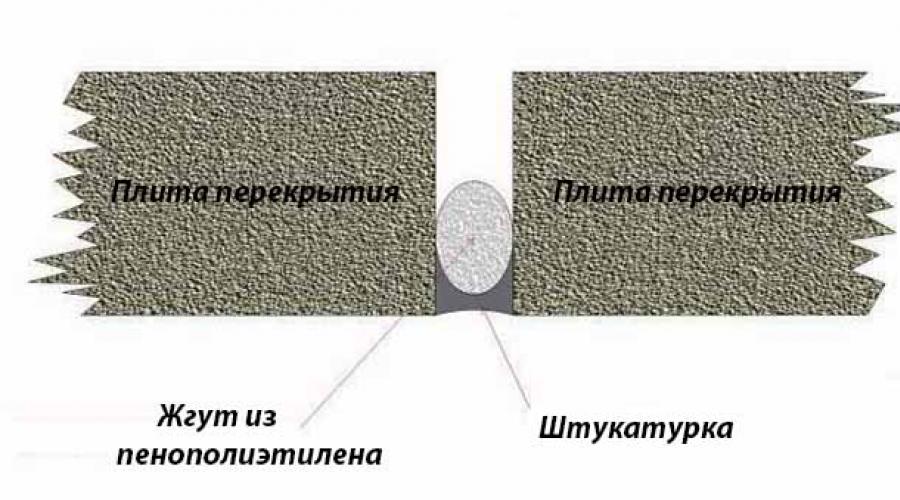
The current technology of sealing of interpute seams does not provide them with filling with any solutions. Instead, elastic polymers are used - polyurethane mounting foam and rollers (harnesses) from foamed polyethylene. The following is the alignment and cosmetic fitting with the use of such materials:
Methods of work
This is presented as wallpaper. Installing the ceiling is performed in several ways. There is a glued pose as wallpaper. In your case, it will be impossible because of the holes on the plates, the ceiling will not be pure and tense. There are settings where the fabric is already stretched, it remains only to fix the frames on the ceiling. This system facilitates the installation, as they are easy to manipulate the surface.
How to seal the joints of the plates on the ceiling?
Disadvantage: After some time, the dust will accumulate over the cloth and will distort the ceiling tension, and will also give a gray, dirty fabric. Another fixing solution: reach across the room, ceiling, rope, and lays the applique without a tender, it looks like a roof of the tent is a site that presents its products used in them. Areas. But after installation, this panel is likely to remain in this case. If you do not pick it up when you move.
- primer deep penetration;
- ready plastering mix on a plaster basis;
- finish Latex putty;
- the reinforcing element is a fiberglass, a serpentine or glassball.
Reference. Also for sealing is used phlizelin - dense paper with fibrous inclusions. But it glues over the finishing layer and does not work as a reinforcement. More useful information About different materials you will learn from the video from the master of internal work:
It should negotiate with your homeowner, or he holds him, and reimburses you the cost of this work, or disassembles it, but it will definitely be followed by its presence. If you repose suspended ceilingUse the ability to hide power sources for lighting. It will be easier to configure with the suspended ceiling panel.
You can still repaint the plates of your ceiling if they are polystyrene. Matte acrylic paint should be applied using a cotton roller. And if one layer is not enough to fill the hollow slabs, do not hesitate to apply the second layer. If the result is not yet acceptable, the ceiling will be fairly flat, so you can attach the fabric.
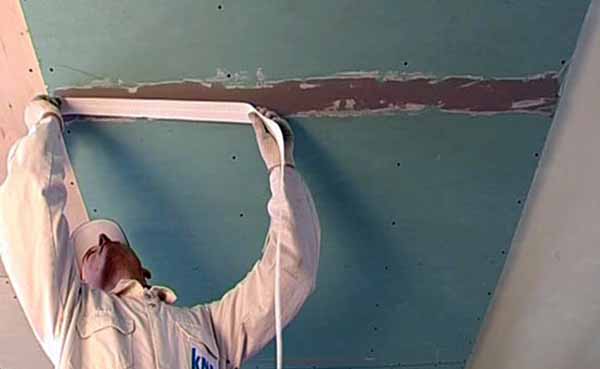
If a large drop is allowed between plates of overlapping builders, then it is extremely difficult to align it at the expense of shocking. The best way out of the situation is to separate the ceiling by plasterboard sheets that create a smooth surface. But between Glk, there are also seams that can give cracks as a result of shrinkage. So the listed materials will be useful and in this case.
Another solution: plaster plaster or plaster plaster, paint thick. You will be easier to connect small holes at the same time. For example, smoothing plaster will perform this work. The advantage of the ceiling coating: You can remove the plates, and the lower ceiling can be cleaned or polished. Then you put the coating that Will Heide flaws bare ceiling, and then paint. In the head of the ceiling on the site of Leroy Merlin you will find many tips depending on the product that you decide to take this suspension ceiling: painting, trim, plaster or plasterboard.
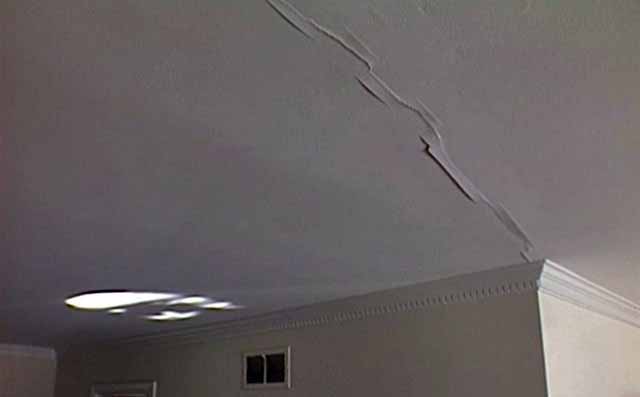
It looks like a crack between plasterboard plates
Preparing overlap to repair
Ideally, the seams of seams between the plates should be accompanied by the full repair of the ceiling. The point is not that the transitions between old and new finish By shakes, they can be successfully painted. Earlier putty is capable of turning at any time and you will have to repair the room again.
Ideal for sealing of drywall buttons
Here are some tracks to explore! If you have other questions, do not hesitate to contact me again.
Seal the junctions of drywall and repair the slopes in the walls
Excellent continuity between walls and ceilings. Ribbon for repair of plasterboard. Machines that level the thickness of the skins constituting the upper part, removing part of the material from the meat. It can edit the edges of the ribs using matrices created using a certain geometry.Sealing slots between plates overlap by mounting foam
Machine that reduces the thickness of the edges upper parts In accordance with the profiles corresponding to the needs of the model. SCOS or "SCOS" blades are implemented using a cup of a cup, which rotates at high speed and with a fixed tilt. Operation can be manual or using matrix. Versions from traditional to computerized.
Council. Close the ceiling rules is completely useless if the roof flows on the last floor. Whatever the material you smell the junction, the water will find a way and destroy the results of all the works. First, it is necessary to take the sealing of the roof section over the apartment.
Fully leather cam machines for shoes and boots. Execution with two vertical lamellar jaws, which move the hand pulling the upper part, forcing it to crawl between the plates. Machines that produce high-frequency energy, which heats up and softens the upper cover, performing special reliefs of the form pressure.
The machine that produces a series of holes lined along the edges or an ordered row in the middle of the parts constituting the upper one. Equipped with one needle punch and continuously served. The special version of the backer is designed to perform holes for towing drilling at the same time on both upper eyelashes.
To work it will take a simple set of tools:
- wide and narrow spatula;
- a trailer with a stirrer;
- chisel with a hammer or an old hatch;
- brush with a metal pile;
- brush - McList;
- manual sprayer.
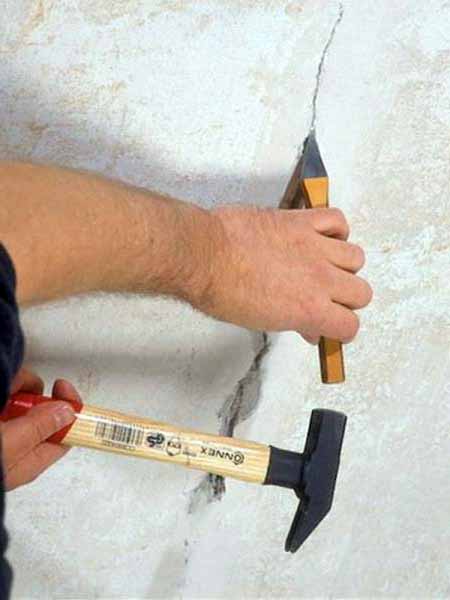
Before close the gaps between the slabs, you need to draw them out, remove the old solution and hang a putty from the ceilings. The technology is simple: spray all the surface with water and after 15 minutes, remove the layer of finishing a wide spatula. From interpanel seams, select the entire solution and pull out the pass, then clean the cavity with the brush and remove the dust with a dry brush.
Preparation of instruments and materials
The machine that folds the previously scratched edge of the upper parts using thermoplastic glue and performs concave and convex curvilinear cutting operations. Versions from simple to a complex level with an automated control parameters control.
Sew block with a support plate from a flat material. It can perform various types of stitches, various stitches and various transport systems. Sewing machine with a reference base of manual material. Sew block with a support base of the column material.
Get rid of ceiling slots
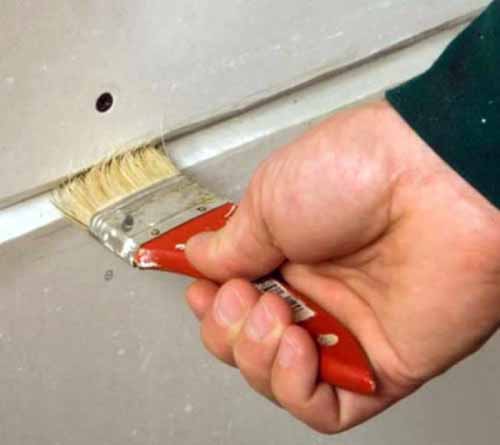
To finally deny the space between the plates and ensure good surface adhesion with finishing materials, Treat the rules with a primer 2 times. Apply the composition with a brush, win the 20-30 minutes necessary for impregnation and drying, and then repeat the operation. For secondary drying, highlight 0.5-1 hours, during which it is desirable not to lift dust indoors.
Pinting machine for drawing faces, rivets, studs, hooks, rings, vis. In fully manual versions, before those who have an automatic charger and with automatic feeding of the programmed step material. In this video, we will tell you in detail and understand the steps on the laying of the inner insulation of the ceiling with the help of multi-layer thermal insulation panels. It is often necessary to isolate the ceiling of unheated premises to reach a cozy climate in the rooms above. Examples are garages or corridors in heated rooms.
Now specifically about how to close the seams between the panels:
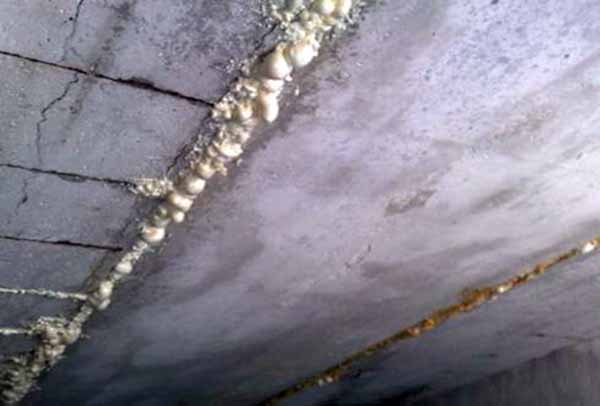
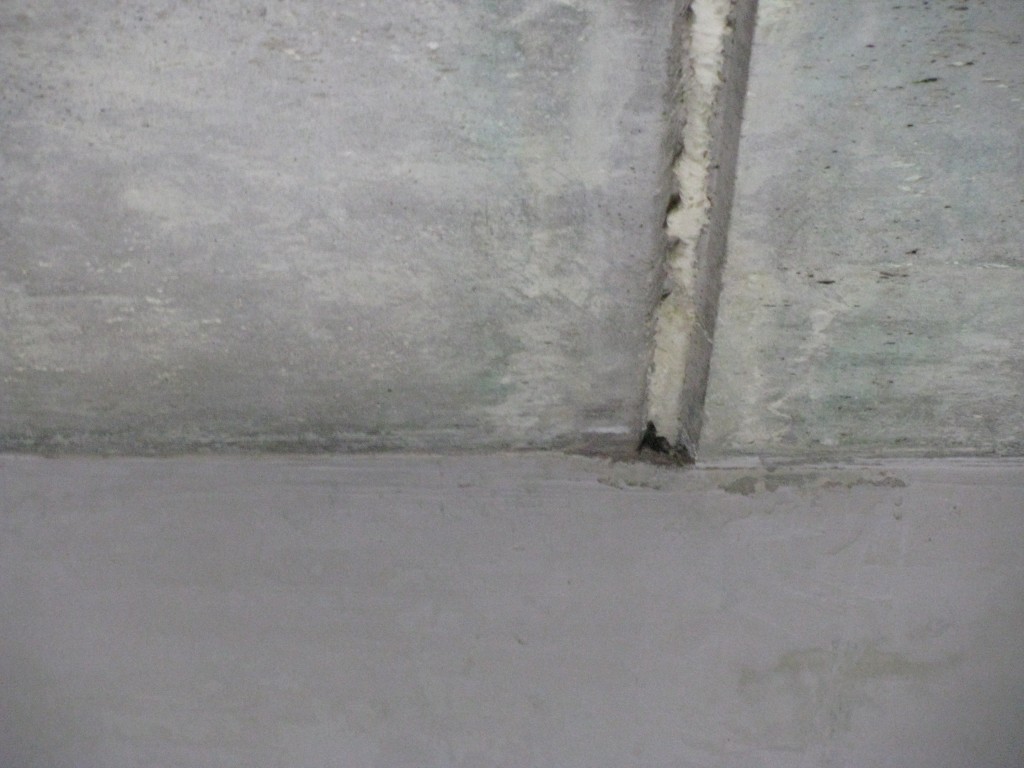
- Wide gaps (from 50 mm) Fill with polyurethane mounting foam, encouraging a plug in the opening. Do not blow the polymer with large portions, after expansion, the excess will still have to trim.
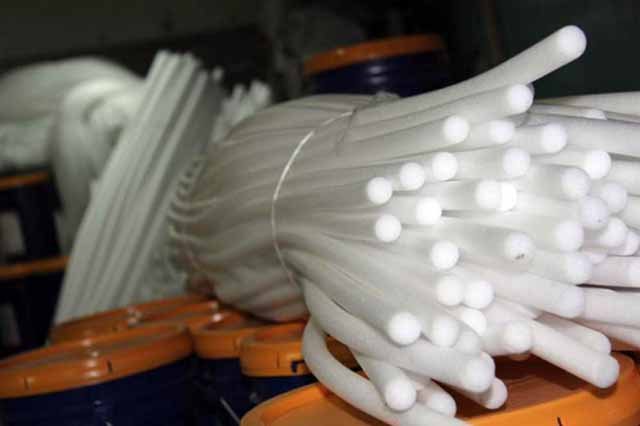
- In the narrow slits, tightly insert rollers from foamed polyethylene.
- Cut the frozen foam with a knife and a spatula, so that there is a slight recess along the junction.
- Prepare gypsum plaster And apply it with a spatula on interpanel seam. The goal is to equalize the surface.
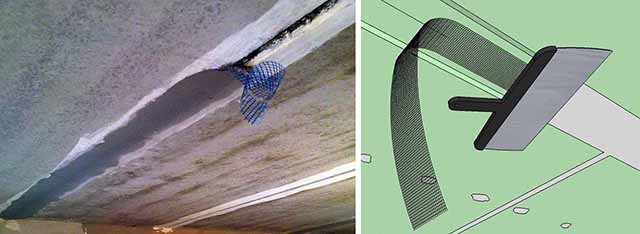
- After soaring the plaster finish, impose a layer of latex putty with a thickness of 2-3 mm and climb a glasswork or glass cholester into it, smoothing with a rubber or silicone spatula.
The film is divided into three stages. When installing internal insulation in the ceiling, you will need: insulating plates, lightweight solution, reinforcement grid, spatula, spatula, bucket, stirring drill, polyurethane foam, grinding board, grater and saw. The first step is to remove old ceilings and paints from the ceiling. The base should be clean and dusty.
Prepare the adhesive solution, stirring it with a stirrer - one bag with a slight solution with 8 liters of water until a paste-like consistency is achieved. Ensure that the adhesive solution has the right density. The glue does not apply to vertical joints. With a slight pressure, the plates are glued to the ceiling by about 3-4 cm from the already glued plates and slide to them. This leads to a better clutch with the base. Slide must be perpendicular to the direction of applying glue. For 1 m 2 you need 3, 3 pieces of multiple plates.
Note. Using the above-described technology, you can successfully close the interpanel rusts in any building with reinforced concrete overlap - At the cottage, in the garage or.
In the new building, the repair of the ceilings at this stage is preferably suspended, if possible - for a week. During this period, it is necessary to observe the state of the seams for the occurrence of fresh cracks. Their appearance indicates the continuation of the shrinkage of the house. The output is to disguise the defect, placing the flieslinic sheets or "web" - a thin glass cooler. At the end, proceed to the finishing finish and painting of the panels.
How to remove seams on the ceiling: preparatory stage
Plates are easily cut to a specified size with a saw. All shocks are easily removed using a multi-state or grinding board. Continue until the entire ceiling is applied. The resulting connection between the stoves and the walls is filled with polyurethane foam.
With a thickness of more than 15 cm or subsequent plaster, it is necessary to moisten the ceiling. In this case, the dowels are installed after the reinforcing grid. In the case of garages, glued plates cannot be plastered. Even at the same time they have aesthetic form. If you wish, you can smear light and reinforcing mesh panels, performing the same steps as when insulated walls.
Cracks at the junctions of plasterboard sheets are eliminated in the same way - putty and sticking the strips of the glass cholester. It is not necessary to separate the gaps. How seams are made by masters, see the next video:
Technology repair work
Or browse the rest of the videos. The headquarters of the company is in Duisburg, Germany. In family houses, apartments and offices, space is optically and functionally divided into sections. They must have the required heat and sound insulation properties, as well as the required fire resistance. These requirements satisfy modern insulating materials that can be combined with practically with any supporting construction materials.
What to close the jokes on the ceiling
The support structure is attached to the walls, floor and ceiling. Hyplic or gypsum fiber plates are attached to it. Metal perimeter profiles must be acoustically separated from existing walls and floors around the perimeter. This is achieved due to the fact that profiles are subjected to a constant flexible sealing tape or sealing compounds with constantly elastic sealant. From the side, the structure is covered with suitable facing plates. It is advisable to screw the sheet or a wooden grid through a flexible tape to improve sound insulation in the air.
Conclusion
The only moment complicating the sealing of the inexperienced performer is the inconvenience of the production of works on the hanging horizontal surface. It will be necessary for some time to attract and gently shut out the seams with your own hands. Note that not every hired master - plasterer is able to qualitatively fade the ceiling, because many have accustomed to working on the old manner - cement-sandy solution. So it makes sense to solve the task yourself.
Close up the seams between the plates. Using suspended systems
The obtained section is sufficient for regular separation of residential premises. However, if they need to be isolated before the sound of higher intensity, it is recommended to strengthen the insulation or install it in two layers. Improving sound insulation is also achieved by increasing the number of plasterboard plates - they must be installed from each other. From the point of view of acoustic insulation, it is preferable that the structure is asymmetric; For light gypsum boards, this means to use different thickness of boards on the walls of the partition or achieve asymmetry by doubleing the boards on one side of the partition.
In apartments of the panel houses, the question of the sealing of intercineary ceiling seams is quite acute - how many do not smear and do not flush seams, it will still give a crack. Fortunately, this situation is not hopeless, and in our article you can find the answer to the question of how to close the seams on the ceiling.
In addition, the problem of the presence of seams is highly relevant and for the finishing coating of the ceiling surface with decorative tiles. How to get rid of seams on the ceiling in this case, we will also figure it out.
This will eliminate or at least reduce the resonant effects and thereby improve the acoustic properties of the rod. Even a higher audio intensity can be significantly reduced by building a brick partition with a preliminary wall. It must be installed in front of the brick wall, without touching each other. Frame from steel profiles or wooden potatoes should be fixed on the walls, ceiling and semi separately, without contact with its own masonry. This design must be separated by a flexible ribbon around the perimeter.
Sealing the ceiling seam between overlap plates
Before starting the restoration of the ceiling, you must prepare the following set of tools and materials:
- a perforator equipped with a shovel in the form of a blade;
- acute building knife;
- small painting brush;
- building pistol;
- putty knife;
- mounting foam;
- leveling construction mixture;
- primer;
- putty.
Instructions for sealing the ceiling seam
Consider how to close the ceiling seam with your own hands so that it is reliable and with time did not crack:
- The existing seam is needed to be cleaned of the previous finish, leveling layer, etc.
- Next, using a perforator with a special nozzle (blade) of seams should be expanded.
- With the help of a construction knife, seam is carefully cleaned by small irregularities and garbage. The same should be taken in special cases - in the fields of pipes in the ceiling or if installed indoors swedish wall With fastening.
- At the end of cleaning the seam, its surface is needed from the inside to wash with a primer solution. Do this most convenient through a small painting brush.
Tip! The primer solution is better to choose with a deep penetration effect.
- When the primer dries, the ceiling seams can be performed directly.
- The seam depth must be filled with mounting foam using a construction gun for this.
- It will be necessary to give foam to dry, and after it is necessary to cut it over with a sharp knife.
- Next, you can proceed to the preparation of the construction mixture. The mixture is divorced according to the instructions on the packaging and is carefully laid out so that there is no commerce.
- To the seam in the end was stationary, it is recommended to additionally perform its reinforcement with a construction grid (sickle). The grid is glued on the seam, and the leveling layer of the construction mixture is superimposed on top of it. Close the seams on the ceiling in such a way that the construction mixture is completely filled with the space between the serpanka and construction foam.
- When construction mixture It can dry, seam and the ceiling as a whole can be finally aligned with putty.
Seaming seams on the ceiling, made according to this technology, subject to a clear compliance of the instruction will allow you to forget about the appearing cracks on.

Ceiling tile without seams
If you are planning to go and want the tile surface to do notes of the seams, it is recommended to use a special tile of "Ceiling without seams". A good tool for this can serve, for example, a ceiling without seams format, or the ceiling tile of any other manufacturer.
The new technology of seamless laying of tiles, invented by manufacturers, minimizes the magnitude and visibility of seams between the elements, to make the surface is smooth and holistic.
The ceiling without seams is mounted according to similar technology with conventional tiles, however, has some features of the styling:
- After buying, the material should lie in the repaired room. It is desirable for a day in a unpacked form.
- The ceiling base should be well aligned with putty and primed.
- Tile should be carefully sorted, remove the defective (uneven) tile in the presence of such.
- After the ceiling markup on the tile is applied glue. It is done not only on the rear surface of the material, but also from the sides (neatly wash the ends of the tile elements).

- After two tiled elements are connected on the ceiling, the ceiling seam (junction) is strengthened between them to be strengthened with construction tape, so that the plates remain in the initial position after drying the glue.
When glue dries, the tape can be deleted.
Naturally, the technology is not a panacea, and the seams, though they will be low, but they will still take place.
So, we found out how to close the ceiling seam of various nature - intergraph and formed at the junction of decorative ceiling plates. Using in practice our tips and recommendations, you can save yourself from the annoying problem of ceiling seams, make a ceiling in your home holistic and kr "width \u003d" 640 "Height \u003d" 480 "Frameborder \u003d" 0 "AllowFullScreen \u003d" AllowFullScreen "\u003e
If you wish to get rid of the slightest signs of the seams, you can close them as follows:
- Before close the seams in the ceiling, you should prepare a suitable smear. As a lull for seams, you can use a special grout.
Tip! From using silicone sealant it is better to refrain because it turns yellow.
- Fill the seam directly from the tube or by using a narrow spatula when using the mixture.
- The seams need to be filling carefully, avoiding the skips, after which it is removed with a clean rag of the composition.
So, we found out how to close the ceiling seam of various nature - intergraph and formed at the junction of decorative ceiling plates. Using in practice our tips and recommendations, you can save yourself from the annoying ceiling seams, make the ceiling in your home holistic and beautiful.